Monday, January 24, 2011

Grout is In!

Dave finished the grouting and he did an absolutely incredible job! Here's a close-up of his handy work:


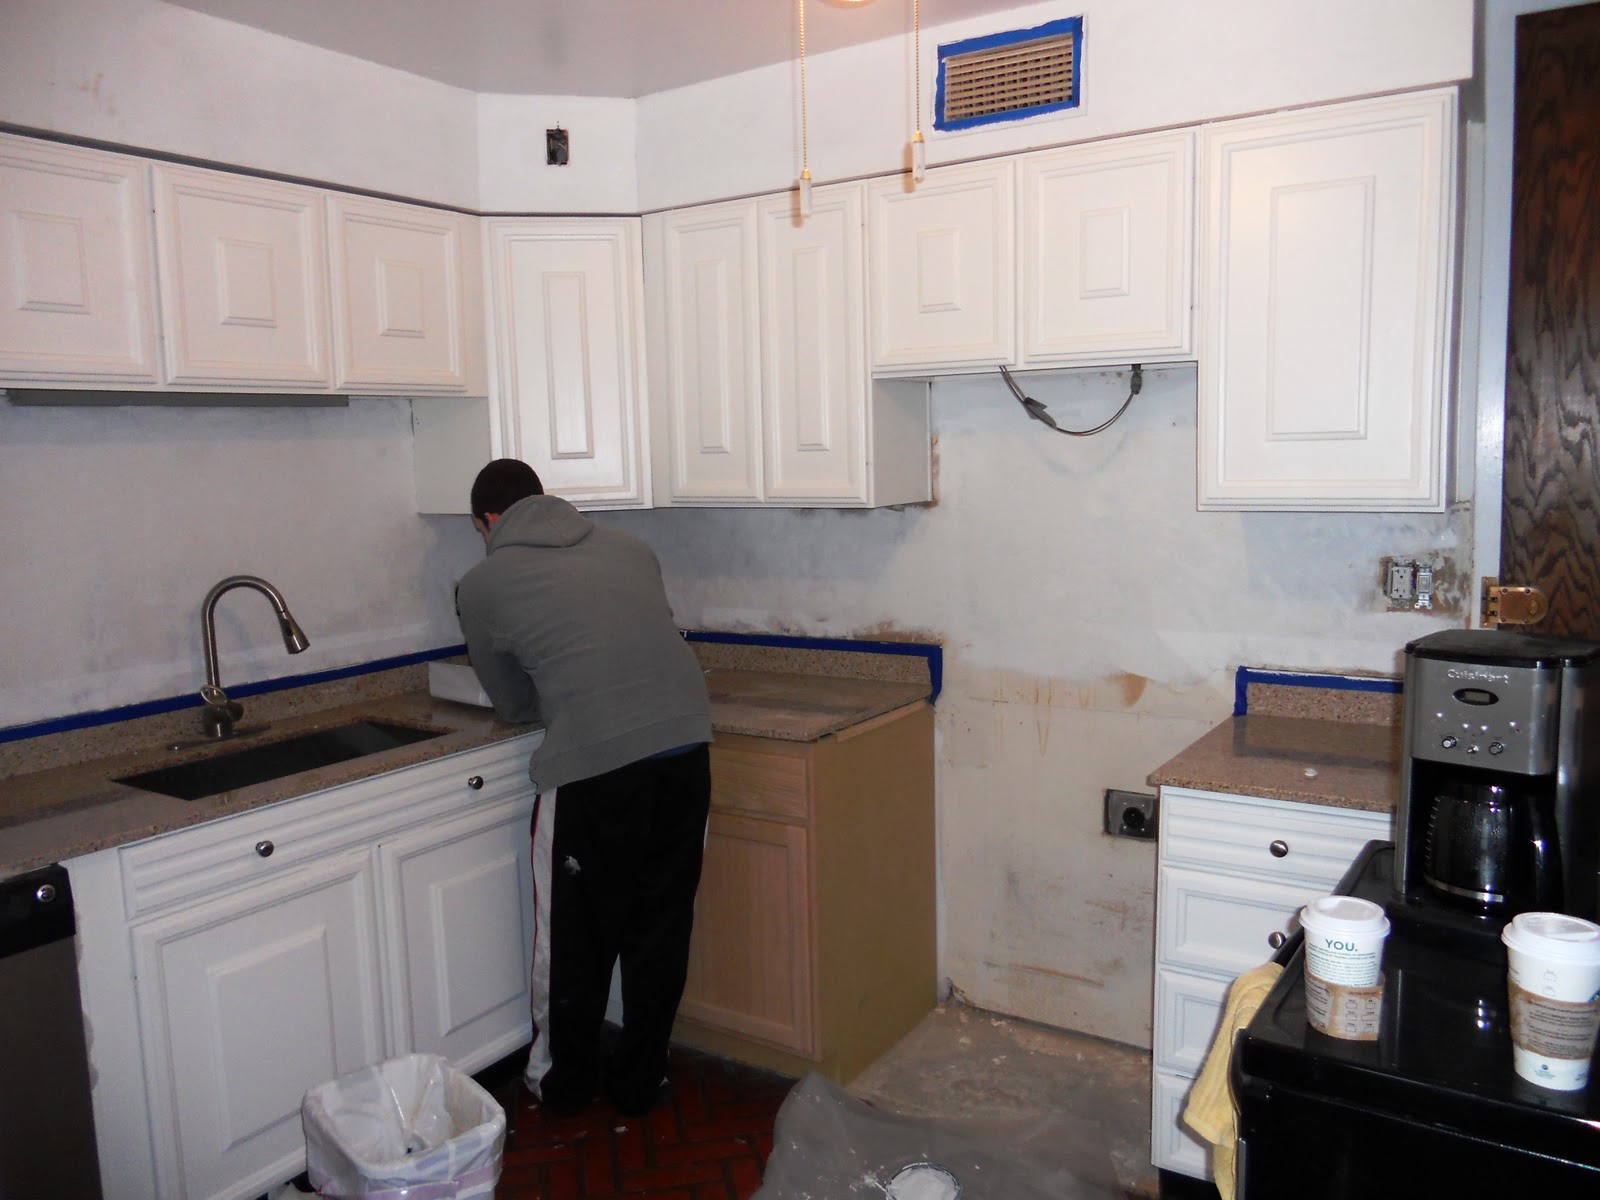
Our kitchen is looking so new and fresh and pretty! Who could ever have known when we started with this:

(and this photo actually includes the first upgrade of a functioning faucet!)
 that we could end up with something this great in the same space?! I mean, it's purrrrty:


(pretty good before-and-after, eh? especially for two of the least handy people we know!)

It's nearly finished... so close!

Sunday, January 23, 2011

Tile is Up!

PHEW! That was a long day! But it ends with a fist bump because the tile is up! We hit some bumpy spots for sure, including tight corners, and odd uneven lines thanks to the not-so-perfect cabinets and floors in this unit, but Dave was Master of the Tile Cutter, and I was Master Tile Cleaner, and it's looking pretty good, if we do say so ourselves. All in all, it might not be perfect, but it's fairly close, and we're excited to soon see and share the finished product... tomorrow is grouting!

So here's a quick photo summary of our kitchen at the end of tiling day:


So... while today turned out to be a bad day for Da Bears, it was a good day for tiling and Steelers (that's mostly for my dear friend ELH, but also: Tribe Pride, Coach Tomlin!).

Stay tuned for what promises to be an exciting grouting round-up! Ha!

Tiling...

We are deep in tile-application mode! Yesterday was prep day, with Dave priming the walls for adhesive and tile:


Then we let that dry and moved onto prepping ourselves for today's task: actually tiling the wall. Dave set the alarm for 7:15 (we had to make significant progress before the Bears game!), and I got up at 7:45 and found this going on in the kitchen:

(woo-hoo!)
Dave had a rhythm going, including cutting tiles himself:


But at a certain point, enough had been accomplished for me to step back in and start doing my job, which is to clean up the excess adhesive between tiles, and make sure none of it is drying onto the tile surface. This is extraordinarily tedious and tiresome, but yields exciting results!

(in the past five months, we have found a simple blade to be a super multi-purpose tool)

We are now complete with the entire wall between the furthest right edge and the edge of the cabinet above and to the left of the stove area. Next chunk to be tackled (ha!) at halftime...

GO BEARS!

Friday, January 21, 2011

WINTER...

Winter in Chicago is... well, long. and not fun. and friggin' freezing, usually. But so far this winter we've been fairly lucky, for which I am utterly grateful, even though I'm still ready for it to be over (and have been since November). We've been hearing all week about how cold it's going to be today. Last night, the top story on the news was how to keep your home warm enough to protect you, and to protect it from windows freezing to cracking, and all kinds of other nonsense. The wind chill, we were told, would be -30. And the air temperature? NEGATIVE 3! So... I woke up this morning and thought about how long I could stay in bed without making myself late for work. I lay awake deciding how to layer up. And then, when I finally got up, I took a warm shower, put on my warmest layers, ate breakfast, and then, took Lanie out for her morning walk (not a walk-walk... a do-your-business-it's-freezing-we're-going-back-in walk). We walked outside, and sure enough, it was pretty shockingly cold. However, once again, our surroundings reminded me why we are where we are.

It is so cold today, that steam is rising off the frozen lake-top! And the sun is shining (in winter, this is the sure sign of frigid temperatures), and... I dare say... it's beautiful. So check it out:


What this weather means is that we have no excuse for not finishing the backsplash (Adi, get over it) this weekend... because who is leaving the house?! We'll surely have something to report as the weekend goes by!

Happy Friday!

Thursday, January 20, 2011

20th Project - January

Today is the 20th of January, 2011. Our fifth month in our new home. And this is what the beach looked like this morning at first light:


(To run through all five months' 20ths, just click on the "20th Project" tag on the right...)

Tuesday, January 18, 2011

Wall Revival... Day 3

Not only did Dave come home and make a delicious dinner tonight of homemade pizza, but he also accomplished the first sanding and second spackling of the wall. It's hard to tell from photos (since it pretty much looks exactly the same as yesterday), but it's really coming along. The wall already seems close to even, so we're hoping it's just one more sanding (after this layer of spackle dries), and on to priming and applying of tiles... very exciting.

Here's proof that while we can tell progress has been made, it looks identical to how it looked at the end of the day yesterday:
(sorry 'bout that shadow)
And since that's not so exciting, here's a shot from yesterday afternoon in which it is demonstrated that Lanie is proud of Dave's hard work:

(high five!)
Onward to Day 4! Go Dave!


Monday, January 17, 2011

The Wall: Continued...

With regards to our ongoing kitchen update project, we have spent the last week a) completing the removal of the ancient chunky tile adhesive from the wall (Dave), and b) researching how to proceed. The removal of the chunky adhesive presented us with a stumbling block... basically, that process left some of the drywall "brown" (meaning it removed a layer of paper) and in some areas the drywall was chipped a little more by the adhesive removal (done with a scraper, quite crudely).

We wondered, could we put glass or ceramic tile, using a tile adhesive, directly over the drywall that had lost some of its paper layer? Dave read that you might want to use a product called "Guardz" and then a latex paint primer before re-applying adhesive and tiles. We were also hoping we could use spackle to smooth out the drywall spots. But we weren't sure. We were desperately hopeful we would not have to completely redo the drywall... So we spent a lot of time online, and seeking out the advice of friends who know better. Ultimately, the question was what order to proceed, if our gut instinct was to:
 
1.   finish removing adhesive;
2.   patch dented areas with spackling and let dry;
3.   sand lightly;
4.   (apply primer or Guardz, or both?);
4a. sand again lightly;
5.   get ceramic or glass tiles and some type of adhesive and apply.

As usual, the web had a billion opinions... but the ultimate conclusion we came to, with the help of a few friends and then the "experts" at the Tile Outlet, was to follow our gut, mostly. We're not buying "Guardz" but otherwise, we're proceeding as outlined above.

So, today we picked out our tile!


(ooh!)
It, and our grout:
(color = "linen")
were selected to match our granite and eventual wall color:


("Ticonderoga Taupe")
We also picked up all of our other supplies:

 
And set to addressing the first go at smoothing out the wall:


The plan is to apply another layer (or two?) of spackle this week until we are confident the wall is fairly even, then to sand it to smooth, then prime, then apply the new tiles!

Slowly but surely... 

Sunday, January 9, 2011

The Wall

This weekend we continued work on the backsplash wall (and again, "we" = "Dave")... The next step in this process is to smooth or remove the ancient chunky adhesive that held the previous tiles to the wall. This is a chore. Our original plan was to simply sand it to smooth. So we bought an orbital sander (under the assumption that this will come in handy for other projects as well, so not a loss if this doesn't work)...


...it didn't really work. We thought about patching it smooth...


 ...this sort of worked, but no, not really...

So Dave went to the hardware store (photo of chunky adhesive-covered wall in tow) to get some professional opinions. The five people working at the Ace he went to each had a different idea - and each debunked the idea of the guy before him. At the end of it, Dave bought only a scraper, and is attacking the wall himself... 


(It must be noted that at a certain point in this process, I came into the kitchen to find Dave wearing the best science lab-protective glasses ever, but he wouldn't let me take a photo...)

If this effort didn't work, we planned to contact our kitchen contractor and simply have him re-dry wall the chunky-glued area... however, after a few hours, we're half way there:


The plan is to finish the scraping, patch where needed, sand smooth, and then move onto tile selection and application.


It continues...


Sunday, January 2, 2011

The Kitchen Project Continues

We are back to work on finishing the kitchen. The final checklist goes as follows:
  1. remove old backsplash
  2. sand wall to flat
  3. select and install new backsplash
  4. paint kitchen
  5. shelf over refrigerator
  6. (microwave)
  7. (floors)
Today we did some investigating at Home Depot and are now prepared and in-process at tackling numbers 1 and 2 on this list. And by "we", I mean Dave.


We purchased a small orbital sander so we can smooth out the wall as soon as Dave's done. No rest for the kitchen renovators...